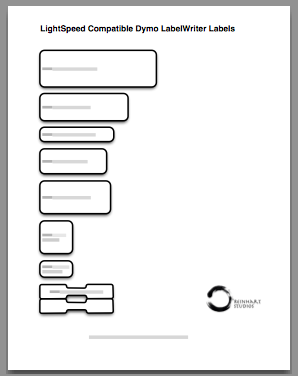
Dymo Labels in LightSpeed POS
I’ve created this handy printable reference page that make it easy to talk to my clients about the various sizes of labels available in LightSpeed when using one of the Dymo LabelWriter printers.

I’ve created this handy printable reference page that make it easy to talk to my clients about the various sizes of labels available in LightSpeed when using one of the Dymo LabelWriter printers.
Printing receipts from LightSpeed for iPad while you’re in your store (on the same network as your LightSpeed server) is easy.
Printing receipts while you’re away from your store is difficult.
<< note: this article will get a little technical >>
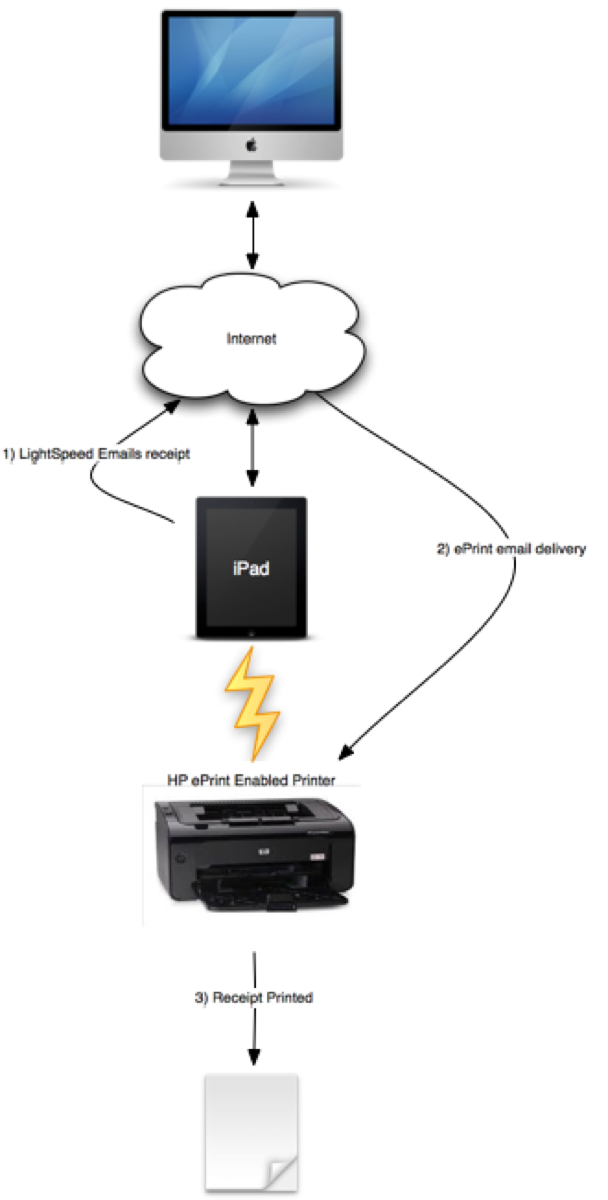
A current client would like to use LightSpeed for iPad remotely at a “pop-up retail” shop– a temporary, one-day only sales venue. In the case of my client, the ability to print a receipt for a customer of their “pop-up” store seems crucial. LightSpeed for iPad can’t really do this because its Client / Server architecture precludes printing to devices with which the Server is not familiar. A printer somewhere out on the Internet is essentially a moving target and so it’s nearly impossible to make the LightSpeed server aware of it.
Let’s examine the usage scenario. In this “pop-up” retail store, we have a sub-section of our Main Store’s inventory available for purchase. Our customers will pay with cash, credit cards, and debit cards. Our LightSpeed Server lives back in our Main Store / Warehouse and is connected to the internet with a static IP address (actually behind a firewall with Port Forwarding enabled for the LightSpeed protocols– more on this later). We’ll need LightSpeed for iPad to connect to our LightSpeed Server for processing sales remotely. Receipts should print to a printer we have nearby in our “pop-up” store.

While I haven’t found a clean and simple way to meet this requirement, I have a few theoretical solutions… Rube Goldberg would be proud.
Make the printer visible on the internet and add it to the LightSpeed Server Mac. Using a 3G enabled WiFi router / access point that has DDNS (such as the EdiMax 3G-6200n), we could print over IP to a receipt printer to which the router is using Port Forwarding.
Email the receipt to a mail enabled printer such as any of the HP ePrint printers. This would mean the printer would have to be configured to join a WiFi network, which could be provided by the iPad itself using the Personal Hotspot feature. I’ve actually tested this scenario and it works, but network latency could keep the customer waiting for the print-out. I’ve diagramed this to the right.
Email the receipt to a fax service which could in turn fax the receipt to a nearby fax machine.
Ultimately, it would be ideal if every customer at the “pop-up” store could simply accept the receipt by email– problem solved.
If you have any other ideas, post them here…
![]() I’m delighted to be conducting an App Spotlight event at the West Edmonton Apple Store. The event will take place on Tuesday August 28th, 2012 from 8am till 9:30 am.
I’m delighted to be conducting an App Spotlight event at the West Edmonton Apple Store. The event will take place on Tuesday August 28th, 2012 from 8am till 9:30 am.
From the Apple Web Site:
App Spotlight: Xsilva LightSpeed
LightSpeed is the next generation Point of Sale system that combines Mac innovation with powerful business logic to offer comprehensive and easy to use tools for retail stores. At this event, presented by Michael Reinhart from Reinhart Studios, you’ll learn how LightSpeed’s streamlined interface gives you a clear overview of your single or multi-store operations, saving you time and giving you absolute control over your business. And you’ll see how LightSpeed Mobile enables your sales staff to bring the retail experience to your customer like no other retail system before it.
I’m proud to announce that I’ll be presenting LightSpeed POS at the Alberta Gift Show, from Sunday August 19th to 22nd, 2012.

LightSpeed makes it easy to create new pages on your webstore, but they don’t display on your store’s home page by default. There’s a little hoop you have to jump through to display your new pages in the tabs at the top of the page.
We wanted to add a tabbed page on our LightSpeed web store that featured a sub-set of products. Using the Web Store Admin Panel, creating a new page on your web store site is easy. Unfortunately, if you want that page displayed you need to edit the index.tpl.php file on the site. This article assumes a basic knowledge of HTML, CSS, and that you know how to edit files on your LightSpeed web store site.
In this file, you’ll find a div section like this:
<div id=”nav” class=”rounded-top”></pre>
Inside this section, you’ll find an HTML unordered list that renders the tabs that appear on your site. After you’ve created a page using the Web Store Admin Panel, add a line inside the UL tags like this:
<li id=”myNewPage”><a href=”<?= _xls_custom_page_url(‘mynewpage’) ?>”><?php _xt(‘My New Page’); ?></a></li>
Replace mynewpage with the “Page Key” you defined. For simplicity, so that css styles are applied to your new tab,leave the id property of the li (list item) alone– I’ll cover fixing that in a later post. You should also change the Title above inside the php_xt property accordingly.
Of course, you’ll need to add keywords to your products that match the “Slideshow Product Tag” we configured back on the Web Store Admin Panel